Description:
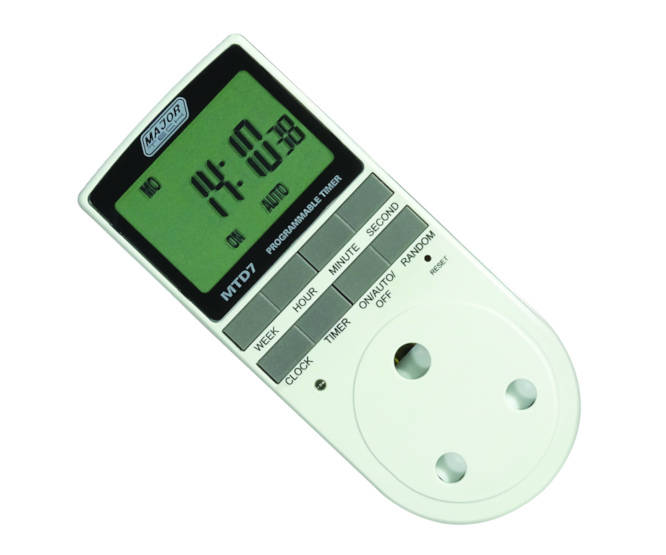
- 8 buttons for easy operation
- Large LCD display with real time display
- 24 hours and 7 days programming with reset function for switching loads up to 3500 watts
- Built-in rechargeable Ni-MH battery so as to maintain the real time clock and programmed times when there is a power failure
- IEC60730 Safety Standard

Up to 6 pcs can be posted at the 1kg rates given below
Buy 6pcs and get FREE postage!
INSTRUCTION MANUAL FOR MTD7 DIGITAL TIMER
IMPORTANT
1. Don’t plug in an appliance where the load exceeds 16 Amps. Always ensure the plug of any appliance is fully inserted into the timer outlet.
2. If cleaning of the timer is required, remove from mains power and wipe it with a dry cloth.
3. Don’t immerse the timer in water or any other liquid under any circumstance.
4. Heaters and similar appliance should never be left un-attended during operation. The manufacturer recommends such appliances not be connected to the timers.
INITIAL OPERATION
1. For initial use, plug the timer into a regular 220-240V household power point and turn the power on.
2. Leave for approximately 12 hours to charge the Memory Back Up batteries.
3. Clear all current information by pressing the R button with a sharp object such as pencil.
4. The timer is now ready to be set up for use.
SETTING CURRENT TIME
1. Press “CLOCK” button While holding this down press hour then minutes and week.
RANDOM FUNCTION
1. Press “RANDOM” button until LCD displays the word "RANDOM".
2. When this function is selected, the timer will execute a random ON/OFF sequence of 30-60 minutes every 2 hours from 06:00PM to 06:00AM.
3. To cancel this function just press "RANDOM" again.
SUMMERTIME
1. Press the "CLOCK" and "ON/AUTO/OFF" simultaneously in the "AUTO" mode. The LCD will show summer. The clock will set back one hour.
2. By pressing the two buttons together again will cancel this function.
12/24 HOUR MODE
1. Press "CLOCK" and "TIMER" simultaneously to turn between 12 and 24 Hour mode.
SETTING PROGRAMS
1. Press “ON/AUTO/OFF” button till “MANUAL OFF” is displayed.
2. Press “TIMER” button once. The “1 ON” is displayed.
3. The timer has the 8 combinations of day or blocks of days as follows for each press.
a. SU
b. MO
c. TU
d. WE
e. TH
f. FR
g. SA
h. SA,SU
i. MO, TU, WE, TH, FR
j. MO, TU, WE, TH, FR, SA, SU
k. --:--
4. Press “WEEK” button until the required combination of days are highlighted.
5. Press “HOUR” and then "Minute" button to set the required time of activation or deactivation.
6. Press “TIMER” button again. “1 OFF” appears. Use the same procedure used in point 4 and 5 to set the rest of your required programs.
7. The timer has a total of 8 ON/OFF programs.
8. When you press RES/RCL during setting, the current setting is cancelled --:-- or recalled.
9. After checking your settings my just pressing the "TIMER" button press the "CLOCK" button which will take you to the current time. The timer is still in "MANUAL OFF" mode.
10.Press “ON/AUTO/OFF” button to show “MANAUL ON” then again till is shows "MANUAL OFF" and finally one more time to show "AUTO" mode. This sequence is required otherwise the timer will not take the settings you have programmed.
SPECIFICATIONS
1. Voltage 220-240V AC 50Hz
2. Max load 16A 3 500W
3. Min Setting Time 1 Minute
4. Accuracy +/- 1 minute per month
5. Operation temperature -5ºC - + 45ºC
6. Battery backup 1.5V DC