Brewing in the Comfort of Your Own Home
Ever wanted to make your own beer? Or simply need a new hobby to keep you occupied? Home brewing beer may be just the thing for you! It is loads of fun and is also very rewarding. Younever know, you may even have a real knack for it and start your own little business on the side. This article should give you a simple guide to creating great tasting home-made beer.
Before we delve into the nitty gritty of it all, one thing is important to mention. Cleanliness is the key to successful beer m
aking.This means that you need to thoroughly clean and sanitise everything that comes into contact with the beer.
Equipment:
- Cleaning chemicals: You will need homebrew-friendly cleaning chemicals.
- Brewing pot: Use a brewing pot that can fit more than 15 litres of liquid to avoid spillage. Purchase a pot that comes with a lid and a built in thermometer.
- Bucket for fermenting: Get yourself a food-grade plastic bucket with a lid and a hole so that you can place the airlock in it.
- Bucket for bottling: You will need another plastic bucket for the bottling process.
- Airlock: The purpose of this gadget is to prevent oxygen and contaminants from entering the bucket and to allow carbon dioxide to escape during the fermentation process.
- Racking cane: This is a long piece of plastic that has a curved end.
- Vinyl siphon hose: This hose fits over the end of the racking cane to transfer beer from one vessel to another.
Steps to Follow:
- Place crushed grains into a muslin or mesh bag, making sure you tie the bag at the end to allow for maximum circulation. Now you need to steep your grains, so place them in the brewing pot with about 10 litres of hot water, at a temperature of about 66 degrees Celsius. Let the grains sit for about 30 minutes. Now you can remove the grain bag. Let the water drip out of the bag but don¿t squeeze it, as you may extract tannins (a yellow or brown organic substance released from grains) that can give your beer an astringent flavour.
- Add the malt extract and bring everything to a boil. Now place the hops in a muslin or mesh bag, add it into the pot,and leave it in there for 60 minutes. Depending on when you add in the hops, it will give the beer certain flavours and bitterness. Hops added in the beginning of the boil give more bitterness and less flavour and aroma, while hops added at the end of the boil give strong flavour and aroma with very little bitterness. About ten minutes before the end of your boil, add in a whirlfloc tablet to settle haze-producing protein and ensure the clarity of your beer.
- Now you need to chill the unfermented beer, also called the "wort". The simplest way to do this is to fill a sink or bathtub with ice-cold water and stick the whole pot in there so it can cool down. Once the wort is around 27 degrees Celsius, it is time to transfer it to the fermenting bucket.
- Using a large strainer, remove the hops. As yeast needs oxygen, splash the wort as you pour it into the fermenter to allow for oxygen creation. Once the fermentation process starts, it is important to ensure that the mixture is not exposed to air. This is because exposure to air can cause bad aromas and flavours. Now add 20 litres of cold water to the mixture.
- Add freeze-dried ale yeast directly into your fermenter; you don't need to stir as the yeast rehydrate themselves. The fermentation process is now in full swing.
- Place the lid on the fermenter and fasten the airlock at the top. Put the fermenting bucket in a dark area where the room temperature remains fairly consistent. If you want to make an ale or lager, refrigeration will be necessary in order for fermentation to take place correctly.
- If the airlock is not active and bubbling within 24 hours, you may have a problem. It is most likely that that the yeast is dead. If the process has been done correctly, after about a week the airlock will stop bubbling. Let the beer mixture rest for a total of two weeks starting from the beginning of the fermentation process.
- The beer is now ready for bottling! Boil some priming sugar or corn sugar, also called dried malt extract, in a little bit of water and then let it cool. Add this to an empty, sanitized bottling bucket.
- Using a racking cane and vinyl siphon hose, transfer the beer to beer bottles as gently as possible. There are two things you need to try and avoid to ensure your beer doesn't taste "off". First, do not let too much air enter the mixture during the transfer. Second, do not transfer any sediment from the fermenter to the bottling bucket (this usually settles at the bottom of the fermenting bucket).
- Store the beer at 20 degrees Celsius for a minimum of seven to ten days.
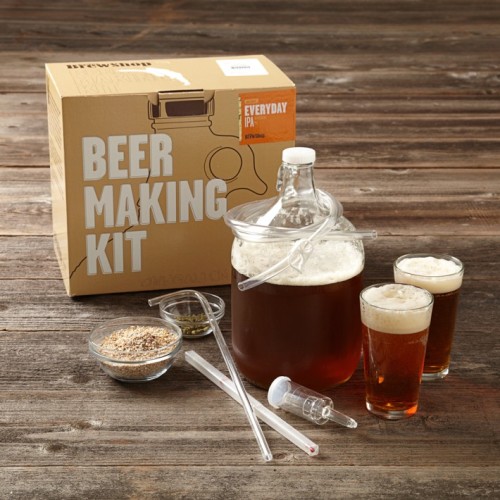
Get your own ho me brewing kit on Bob Shop today!