Similar products


| Main centres: | 1-3 business days |
| Regional areas: | 3-4 business days |
| Remote areas: | 3-5 business days |
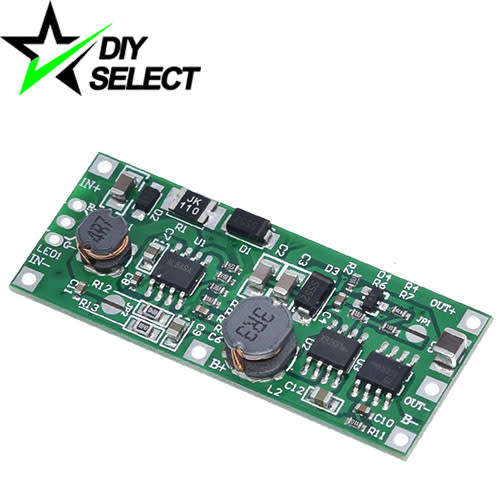
Step Up UPS Module 5-12V to 12V:
Specifications:
Properties: UPS Voltage Converter Module
Working Voltage: 5-12V DC
Output Voltage: 12V DC Default (Unsolder JP1 to change output to 9V)
Output Power: 12W/9W
Support Battery: 3.7V Lithium or polymer battery 15Ah(Max)
Working Temperature Range: -40 to 85
Working Humidity Range: 0%-95% RH
Size: 50 x 20 x 6.3mm
Instructions:
1. Connect right input voltage at input terminal
2. Check output voltage by voltmeter and ammeter
3. Connect battery at B+ and B-
Please note to change from default 12V to 9V output you must unsolder the JP1 connection on the board.
Please note to change from default 0.5A to 1A charging current you must solder the JP2 connection on the board.
Note:
Its max output current is 1A and can not keep output 1A.
The positive and negative poles of the input power supply cannot be reversed Otherwise the module will be damaged.
Users can install a common anode Red-Blue LED by yourself as charging indicators. Blue light indicates whether there is a load at output. Keep Red is charging. There is no battery if Red flashing. Red OFF if charged.
Due to the large current, it is recommended to use a thicker wire. Wire cross-section greater than 1.5 square millimeters.
Application:
Ordinary power supply; Battery charger; Mobile power; Power conversion; Infrared alarm; Camera. Network equipment such as switches; Router; Battery car modification


Please see all our listings here:
https://www.bidorbuy.co.za/seller/4397469