| Main centres: | 1-3 business days |
| Regional areas: | 3-4 business days |
| Remote areas: | 3-5 business days |
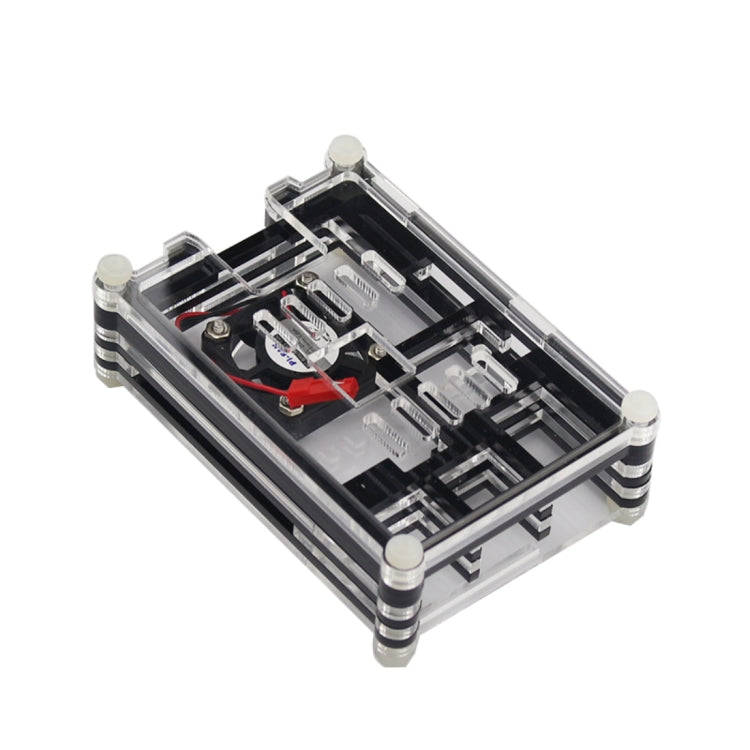
What's in the box?
1 x PI4 Acrylic Case A acrylic parts(remove the protection film)
1 x Nonskid rubber pad (4PCS)
1 x Screwdriver
1 x Screws and standoffs pack
You may also want to grab a 30mm fan and 30mm grill cover. You will also need four M3x16 screws with M3 nuts to mount the fan.
Resources
The Case Consists Of 6 Layers Of Acrylic Panels. Install According To The Following Steps

1. Install the active cooler on the Raspberry Pi 5.


3. Install the long female to female standoffs on the RPi board

4. Install the 4 acrylic panel to the sides of the Raspberry Pi 5.


5. Install the top plate. This is where all the bits come together. You might experience a bit of difficulty aligning all the plates. A bit of pressure on the top plate helps to get all to pop into place.

6. Insert the top 4 screws that holds it all together. You don't have to use force to tighten them.