DC 9V DIY Electronic Kit Red/Green Flash Circuit Board LED Christmas Tree - Create Festive Atmosp...
Check my rate
View locations
| Main centres: | 1-3 business days |
| Regional areas: | 3-4 business days |
| Remote areas: | 3-5 business days |
Product information
DC 9V DIY Electronic Kit Red/Green Flash Circuit Board LED Christmas Tree (10006439)
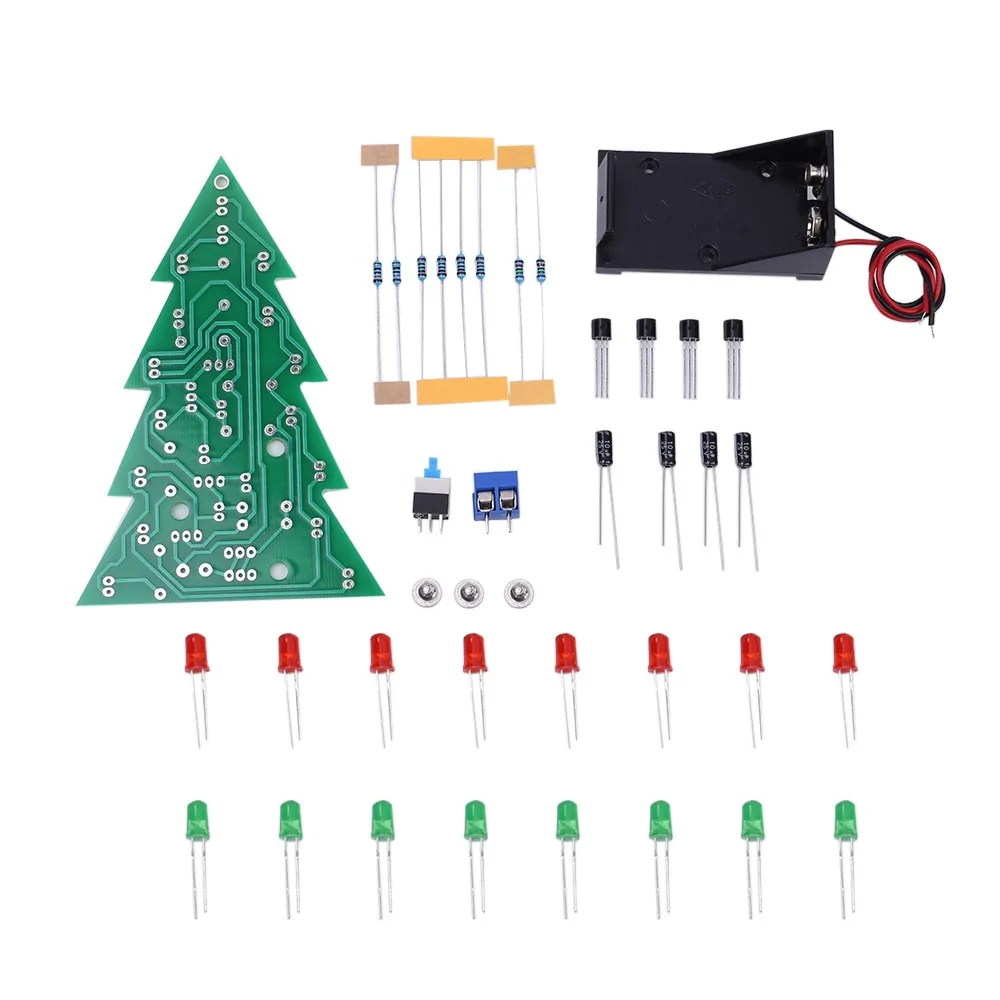
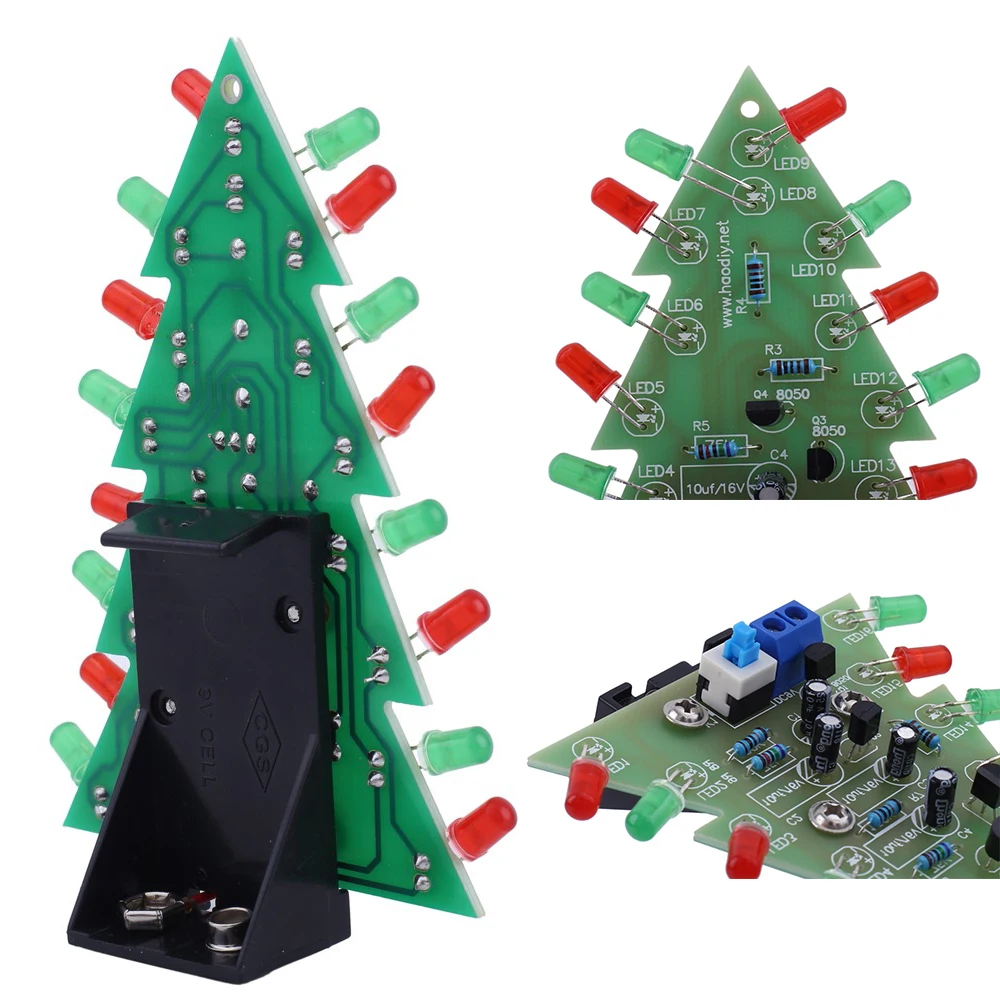
The DC 9V DIY Electronic Kit Red/Green Flash Circuit Board LED Christmas Tree is the perfect way to create a festive atmosphere during the holiday season. This easy-to-assemble kit includes a flashing circuit board with red and green LEDs that mimic the appearance of a Christmas tree. Simply connect the components using the included instructions and plug in the 9V power supply to see the lights twinkle and flash. The compact size of the LED Christmas tree makes it suitable for placing on a desk, table, or mantel, adding a touch of holiday cheer to any space. Whether you are looking to decorate your home, office, or classroom, this DIY electronic kit is a fun and creative way to celebrate the holiday season.
Introduction:
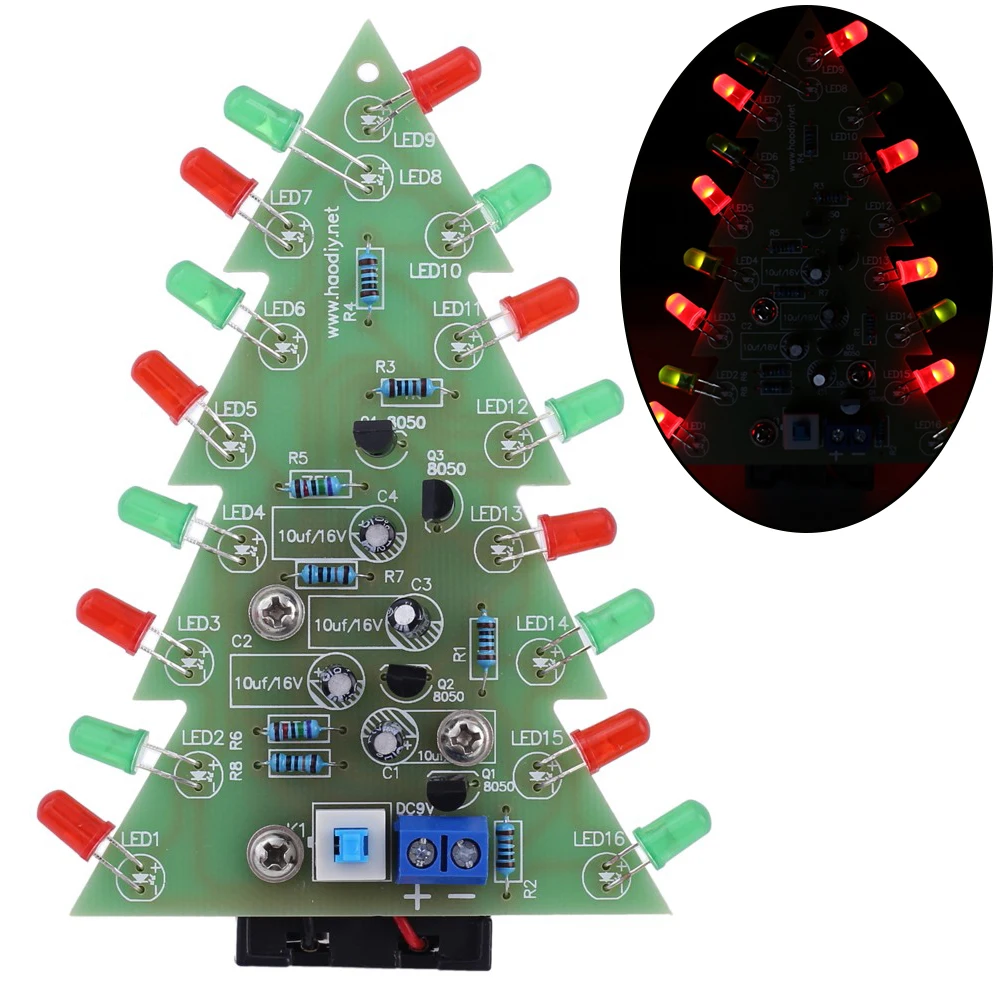
It is a flash Christmas tree kit consists of circuit board, allows 16 LED flash alternately, showing a Christmas tree in the space of two-dimensional profile (the night environment has better viewing).
Feature:
1>.16pcs highlight LED
2>.Perfect simple circuit
3>.Automatic flashing
4>.Comes with 9V battery box
Parameter:
1>.Work Voltage: DC 9V
2>.Work Current:100mA
3>.Power Type: Battery Box
4>.Work Module: Switch Control
5>.Color: Red+Green LED
6>.Work Temperature:-40~85
7>.Work Humidity:0%~95%RH
8>.Size(Installed):110*80*35mm
Application:
1>.Training welding skills
2>.Student school
3>.DIY production
4>.Project Design
5>.Electronic competition
6>.Gift giving
7>.Crafts collection
8>.Home decoration
9>.Souvenir collection
10>.Graduation design
11>.Holiday gifts
Installation Tips:
1>.User needs to prepare the welding tool at first.
2>.Please be patient until the installation is complete.
3>.The package is DIY kit. It need finish install by user.
4>.The soldering iron can't touch the components for a long time(1.0 second), otherwise it will damage the components.
5>.Pay attention to the positive and negative of the components.
6>.Strictly prohibit short circuit.
7>.User must install the LED according to the specified rules. Otherwise some LED will not light.
8>.Install complex components preferentially.
9>.Make sure all components are in right direction and right place.
10>.Check that all of the LED can be illuminated.
11>.It is strongly recommended to read the installation manual before starting installation!!!
12>.Please wear anti-static gloves or anti-static wristbands when installing electronic components.
Installation Steps (Please be patient during assembly!!!):
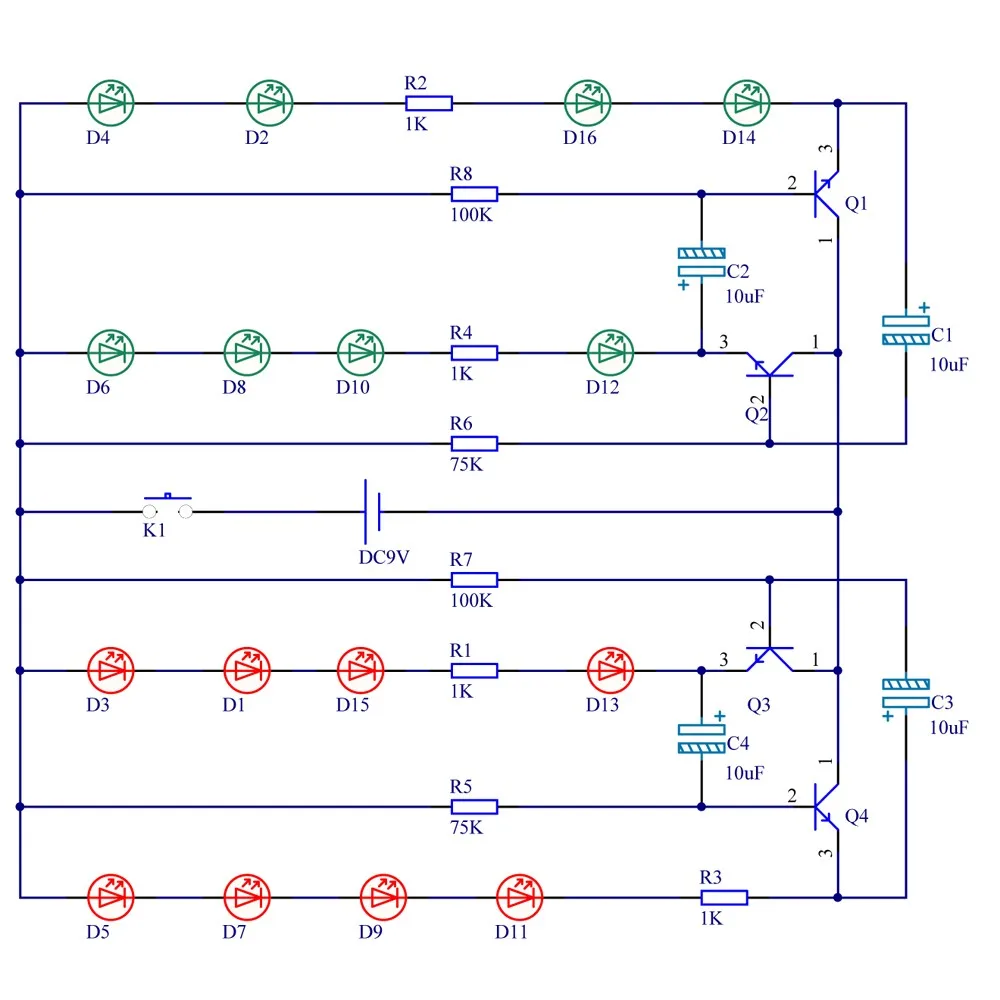
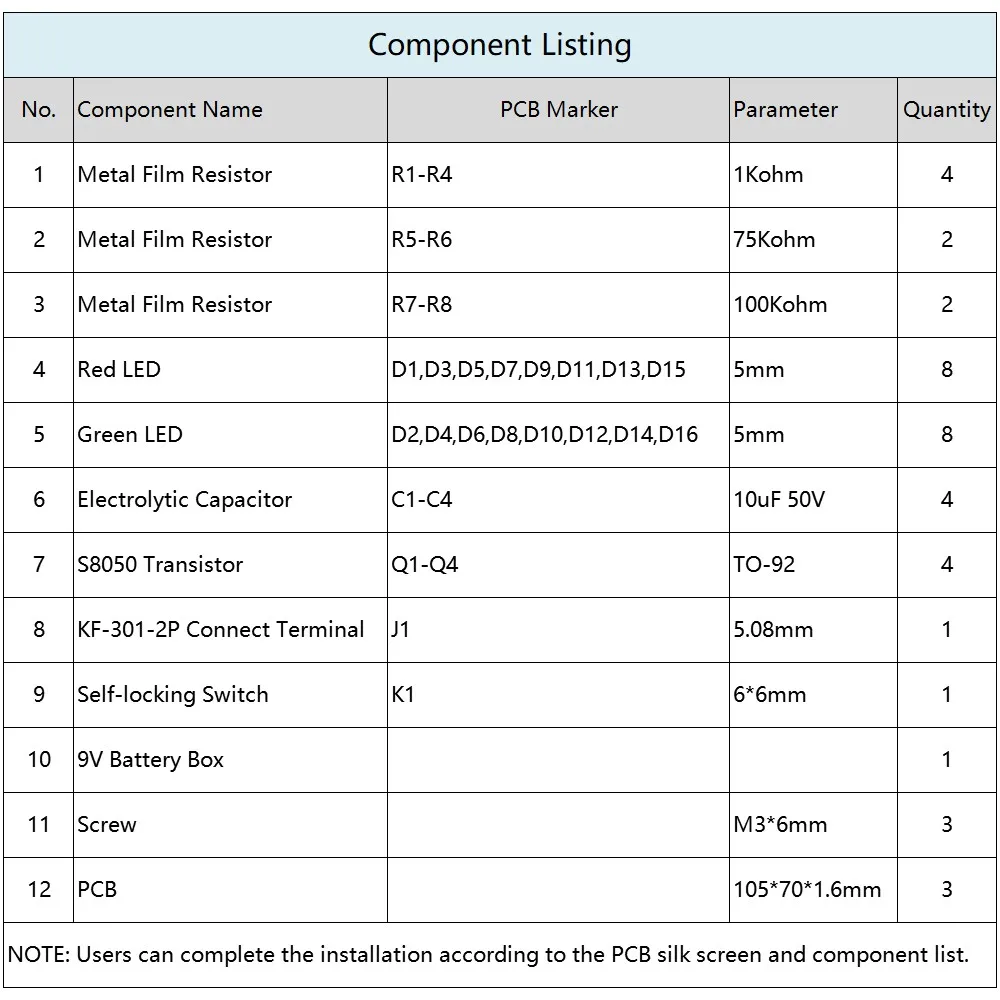
1>.Step 1: Install 4pcs 1Kohm Metal Film Resistor at R1-R4.
2>.Step 2: Install 2pcs 75Kohm Metal Film Resistor at R5-R6.
3>.Step 3: Install 2pcs 100Kohm Metal Film Resistor at R7-R8.
4>.Step 4: Identification LED. The Longer pin is positive pole. The longer pin is inserted into the pad which has marked ' + '.
5>.Step 5: Install 8pcs 5mm Red LED at D1,D3,D5,D7,D9,D11,D13,D15.Bend the LED at the same time.
6>.Step 6: Install 8pcs 5mm Green LED at D2,D4,D6,D8,D10,D12,D14,D16.Bend the LED at the same time.
7>.Step 7: Install 4pcs TO-92 S8050 Transistor at Q1-Q4.
8>.Step 8: Install 4pcs 10uF 50V Electrolytic Capacitor at C1-C4.Pay attention to distinguish between positive and negative. The Longer pin is positive pole. The longer pin is inserted into the pad which has marked ' + '.
9>.Step 9: Install 1pcs KF-301-2P 5.08mm Connect Terminal at J1.(KF-301-2P does not need to be installed if provide by battery box)
10>.Step 10: Install 1pcs Self-locking Switch at K1. Pay attention to the installation direction.
11>.Step 11: Install 1pcs 9V Battery Box.
12>.Step 12: Fix battery box by 3pcs M3*6mm screw.
13>.Step 13: Connect to power supply and enjoy the effect.