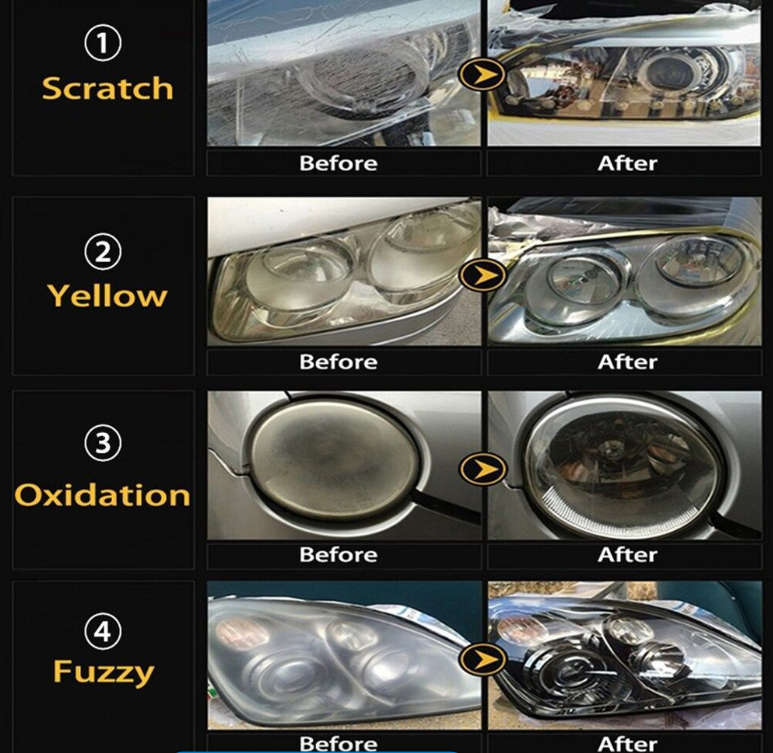
Headlight Restoration Kit allows you to shine and restore plastic lenses, including headlamps, taillights, fog, and directional lights
- Now you can produce professional results with your headlight lens restoration kit
- Headlight restoration is very good, it can make your light fresh again
How to use:
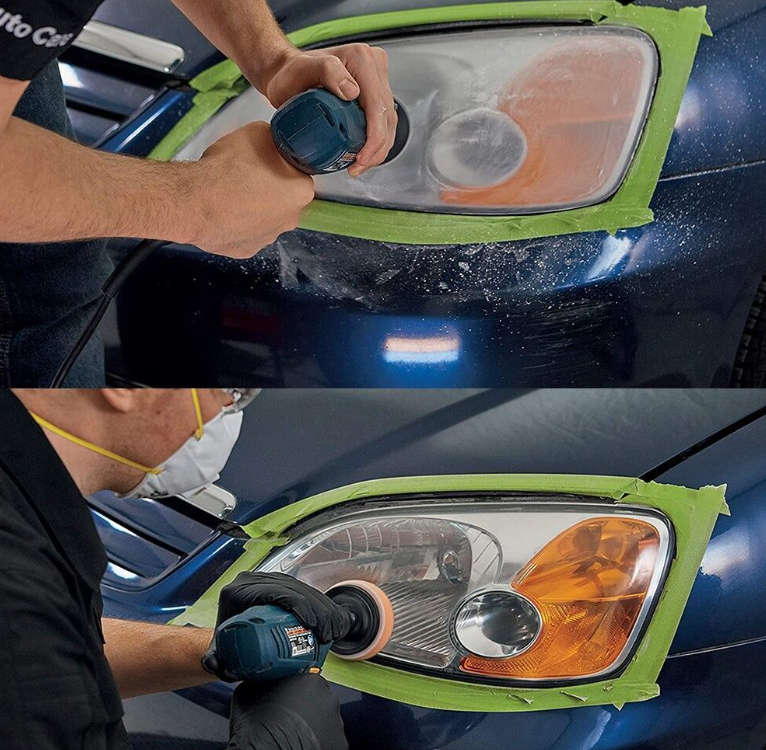
- Prepare: Clean the headlight lenses with water. Mask the surrounding perimeter of the lens to avoid scratching the vehicle paint.
- Step1. Sand
- Wet the sanding disc and attach it to the backing pad. Sand with three different grits to completely remove heavy yellowing, fading, and corrosion.
- Note: Use coarse to fine sanding discs: P800-> P1200 - P2000. Failure to do so will result in a rollback failure
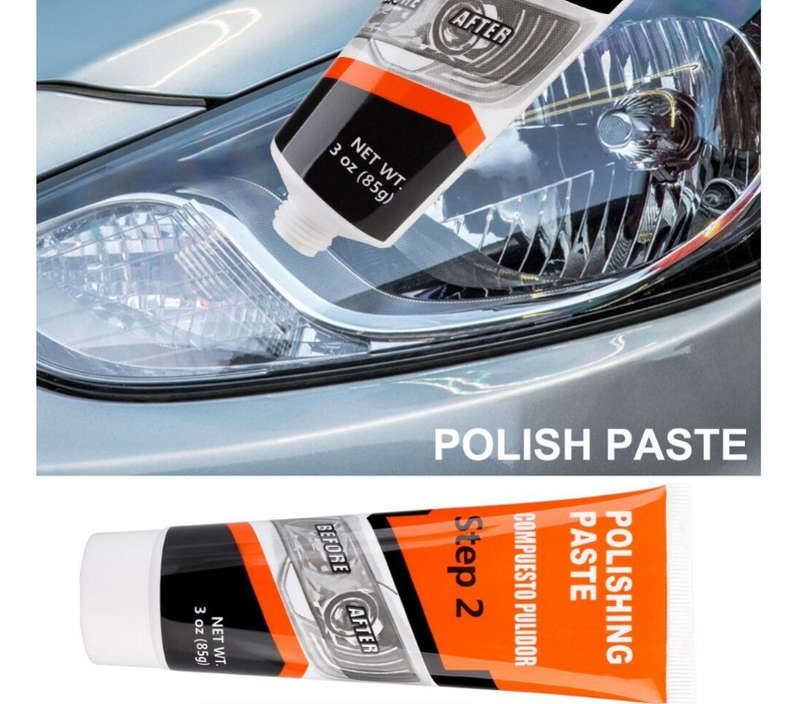
- Step2. Polish
- Join. Orange sponge to the backer pad and apply the polishing paste. Polish the lens until the shine is restored to its original state.
- Note: For best results, use an electric buffer or polisher. If hand polishing, polish no less than 200 strokes in a circular, clockwise motion.
- Step3.Protect
- Clean the headlight lenses and make sure the lens is dry before the protection step. Use the white sponge included in the kit. Evenly apply the protective fluid to the surface of the lens. After applying it, stay for 10-15 minutes so that the liquid flows evenly. Then dry it immediately from direct sunlight (1-2 hours is suggested). If not, dust and other dirt will adhere to the protection of the liquid due to its viscosity, which will affect the brightness of the headlight.
Note:
Avoid sunlight after applying protective fluid to the headlight (very important). After step 3, keep the lens dry. Do not wash the car for 24 hours
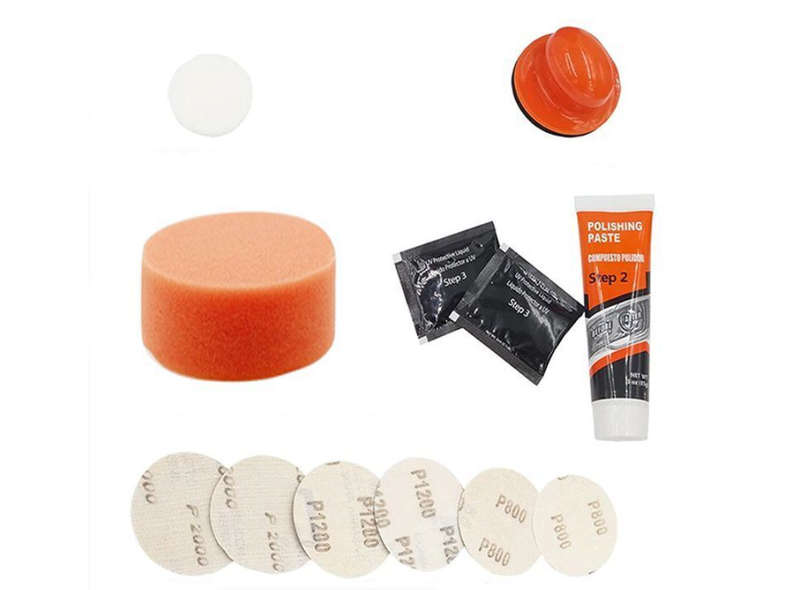
Accessories:
- Sandpaper size: 75mm
- Washing sponge size: 75mm
- Tape size: 50mm
What's in the box
- 1x Orange Sponge
- 1x White sponge
- 1x Polish paste
- 2x UV protect liquid
- 1x mask tape
- 1x Hand buff tool